Pages

Tuesday, September 21, 2010

Mr. Domestic!

Recently, my dearest husband decided he wanted salsa, not fresh salsa like we had been making, but homemade (canned) salsa.  Salsa he can eat on for quite awhile.  Well, he has proven to be quite the canner!  You see, I have never canned a day in my life and did not know the first thing about canning, so he offered to make and can the salsa himself.  Which I let him do as any good wife would, right?

He spoke to his favorite salsa maker and got her recipe and then called her several times during the process.  It was so great to sit back and watch him.  I am very proud of him!  I bought him lots of tomatoes at the Farmer's Market and onions and jalapenos.  The only other thing we needed to purchase was canning jars.  So, without further ado . . . here he is . . . Mr. Domestic

Showing me how to check the tomatoes.
Peeling and dicing the tomatoes.

Making sure it is spicy enough.

Sterilizing the jars.

Tightening the lids as only a gladiator can.

And finally, sealing the jars.

I just love a man who can build a kitchen and then can in said kitchen!  I am very blessed.  And if you are wondering, his salsa has gotten rave reviews and there are only 6 jars left!

Please stop by Foodbuzz and vote for me here.  I hope to make it to round two of their food blogger competition.  The winner (after 10 rounds) receives $10,000 and  will be featured in a special section on Foodbuzz for an entire year!  Thank you for voting. 


Sunday, September 19, 2010

Project Food Blog Entry #1

Here is my first entry in the Project Food Blog contest.  Running true to form I waited until the last minute to enter.  I would like to say there is a good reason for this, but really there isn’t, I actually do my best work when I am under pressure, also this way my post is fresh in your mind when it comes time to vote on Monday!!  Sneaky aren’t I!

Well, there are so many good entries already, it is a tough competition, so I am just going to cut to the chase and tell you who I am and why I blog and let you decide for yourself, if I have what it takes.

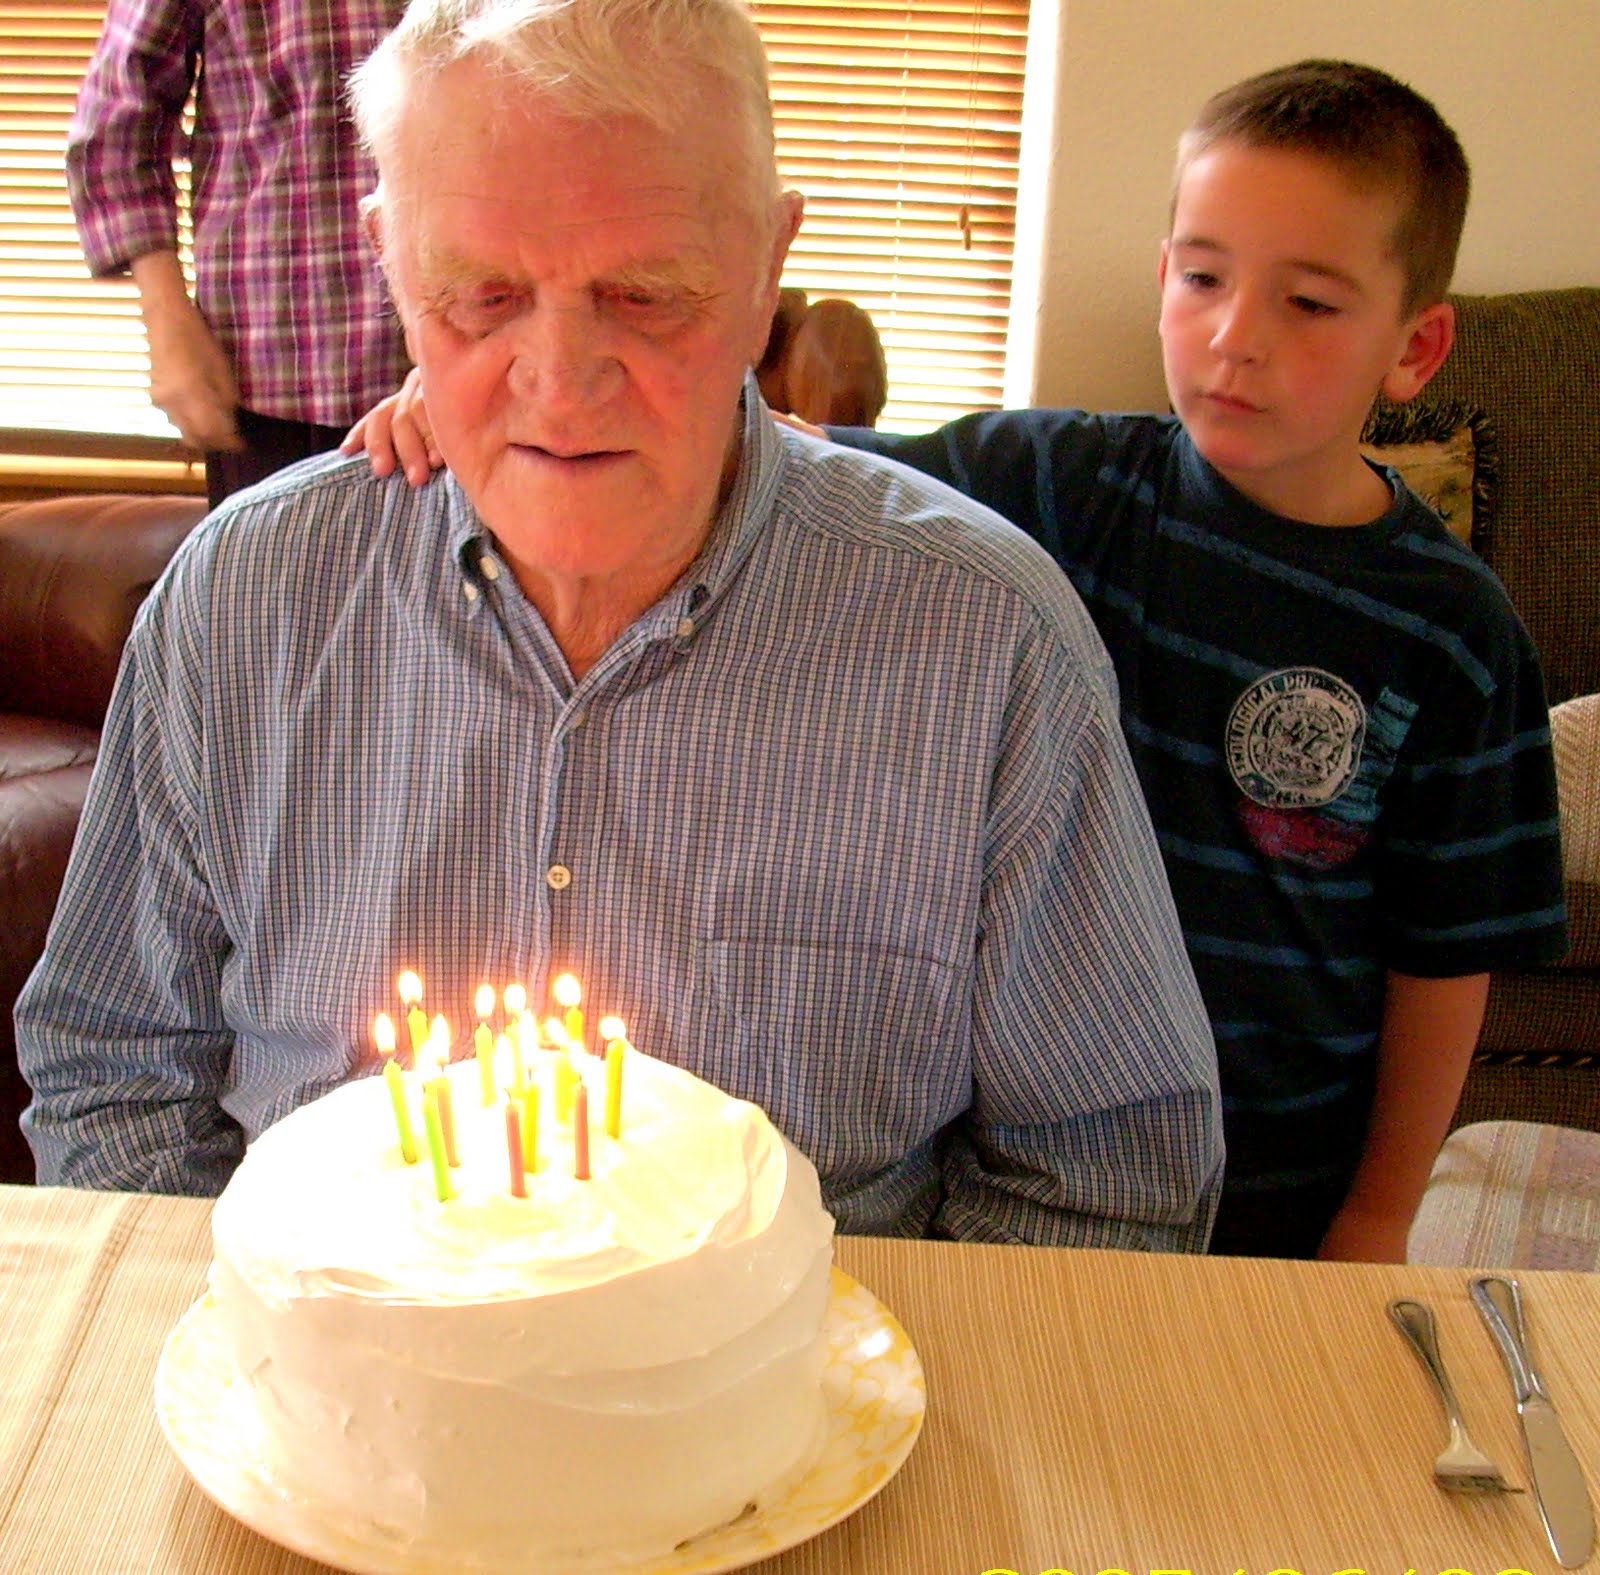
As for who I am, I am a thirty-something mom of three (well, four if you count our wonderful exchange student who is living with us for the school year) who lives literally in the middle of no where.  As in 2 1/2 hours minimum away from a Wal-mart in any direction, midlle of no where.   I miss large grocery stores and restaurants.  I love to cook and bake for my family and friends.  In our neck of the woods I am considered talented in both areas, which is good since we don’t have many options for eating out.  I am best known for my caramel rolls (or crack rollls as some affectionately call them) and cupcakes.  And in our family I make the birthday cakes for the grandparents as a special request.  I love trying new things and therefore I am addicted to cookbooks and cooking magazines.  My favorite website for new recipes is Tasty Kitchen.  I love Tasty Kitchen!  It hasn’t steered me wrong yet.  Although as much as I love new recipes and trying new things, I can’t leave them as is, I am always adding new things, making them my own and I encourage that with whatever recipes I share on my site. I always got in trouble in Mom’s kitchen, because I would often add something to the pot when Mom wasn’t looking!

I started my blog as an outlet for my dream of having a bakehouse, thus the name Gracie B’s Bakehouse.  I am still forming my blog and creating it to be more of what I was hoping for.  So, I am using this contest to help me become better at blogging about food.  Recently, I spoke to someone about making my dream a reality.  It may or may not happen but in our discussion I shared another passion of mine, that has been on the back burner for quite some time, with raising a family and all, and a suggestion was made as how to incorperate it into a bakehouse.  Now, I have decided to act on the suggestion and I am adding it to my blog.  In the near future I am going to share the first chapter in a story I have been dreaming about for some time.  You may ask,'how does that relate to food?'  Well, the heroine of the story deals with some horrible heartaches in the beginning of the story and to deal with it she opens a bakery and finds healing through that and other things that happen along the way.  Wouldn’t you like to know what happens?  I do!


Do I have what it takes to be the next food blog star?

I have always been terrible about selling myself.  That is just who I am.  But I know that I could rise to the challenge that this would present.  It combines what I am best at:  cooking, baking and writing.  What sets me a part from other bloggers is the fact that I do live in the middle of nowhere and I don’t have as many options as others do when it comes to choices at the grocery store.  Therefore what I create is accessible for everyone no matter where they live.   Also, as a coordinator and host mom to exchange students I like to highlight authentic meals from foreign countries.  Last year we opened our home to students from Thailand and Spain and they shared their favorite dishes from home with our family and their friends.  This year we have young friends from Taiwan, Thailand, Finland, Switzerland, Germany, Chile, Italy, and Spain.  I hope to share more with my viewers about our authentic meals.  But what I love most about these meals is that  the students themselves are the ones cooking and creating and I am just there to help out with a little kitchen guidance. 


To sum it all up, I love writing and I love being in the kitchen.  Also, I love sharing my kitchen with others, to learn from them and to teach them something I know.  It is the one place I am comfortable and I know that what I have to share through my posts is different than most other blogs:  my version of restaurant favorites, my fiction, and authentic meals made by students who want to share their world with us are just a few of the reasons I could be the next Food Blog Star!  And don't forget to vote starting tomorrow.

Sunday, September 5, 2010

A future baker in our midst

June brought the annual BizKidz business camp for students that are in Middle School.  It is a week long course on creating your own business.  There is always a variety of businesses represented.  They learn so many things about starting a business including start up costs, profits, loss and so on. On the last day of the camp they open up for business and sell their wares. Chewy participated this year and had his own sweet shop.  He was a baking fool for a few days and this mom did a great job (in my opinion) :) of letting him do almost everything.  I was there to help when needed, but he really did the majority of the work.  His brother, sister, and dad even helped with the packaging.  It was a family business and of course it fell on one of my busiest weeks of the summer, so everyone was needed at some point, but we managed not to go crazy.

I showed him a few of my favorite blogs & these were the things he chose to do:


Did you recognize Bakerella's Super Dad cake pops or her burger and fries?

He also made my famous (around here, anyways) cupcakes.  His shop was a great success and he plans on doing it again next year, only this time it won't be sweets.  Also, his sister will be joining in the fun and I hope and pray that it doesn't fall on the same hectic week it did this year because she is also planning to do something food related.  I can't imagine where they get that from . . . wink wink.  Here are some more pics from his day of sales.


Hammy's Birthday Party

 
My youngest turned seven the end of July.  But, because I was so busy placing exchange students and the kids had VBS & I was there too, we decided to wait on the party.  And life being crazy like it is, we had to do it at the last moment.  That was okay.  He was able to help with his birthday cake and that was what mattered to him.  He wanted a dinosaur theme and that is what he got.

He drew his favorite T-Rex and I drew the rest.  Leandra, our exchange student from Switzerland was a huge help when it came time to trace and create with chocolate.  If you are interested in my post on creating with candy melts, visit this post.
I used an incredible chocolate cake recipe from Tasty Kitchen.  It is now my go-to chocolate recipe and a favorite for my kiddos!  I frosted it with a vanilla buttercream and you didn't need a very big piece.  It was a very rich cake. Happy Birthday, Hammy!  Thanks for being such a great boy!


Wednesday, June 2, 2010

My Version of Strawberry Shortcake

This dessert is a favorite in our household and I have won over many guests with it.  Most recently I made it for the local foreign exchange students as part of their going away dinner.  Their only request was fried chicken, mashed potatoes with gravy and green bean casserole.  I chose the dessert.  In fact as I type this, I think it is time to make it again!

We always use fresh strawberries, sliced and sprinkled with sugar and left to sit while I bake the shortbread.  We also use fresh homemade whipped cream.  Following is the recipe I use for shortbread.  I hope you enjoy our version, we love it.


SHORTBREAD

1 cup softened butter
2 cups flour
1/2 cup powdered sugar
pinch of salt
1 tsp vanilla
1/2 tsp almond extract (optional)

Beat butter until smooth.  Add the rest of the ingredients and mix by hand.  Batter can be crumbly, that is okay. On a lightly floured counter form into a disc and roll out, if dough does not cooperate, you may want to chill it for a short time (1/2 hr).  Once it is rolled to desired thickness, cut out with round or scalloped cookie cutters of preferred size, two cookies will be used for each serving.  You can chill cut-out cookies on baking sheet for 10 -15 minutes to hold their shape better, but that is optional.

Bake in a 350 degree oven for 8-10 minutes or until lightly browned.  Once shortbread is cool you may assemble the strawberry shortcake stacks.

***  In the past, I have just made one big shortbread cookie and cut it into squares or wedges, but I think the cutouts would provide better results as well as prettier than wedges!

Wednesday, May 5, 2010

Home is . . . Crab Apple Blossoms

This a quick post, because I have missed participating in Sandy's Home is . . . party the last couple of weeks.  Today's  party is about flowers.  At the moment these are the only blossoms in my yard, although I hope to change that once the danger of frost is gone.  I do get to view this tree from one of my kitchen windows and I love the color I see.  I wait every year for this vibrant pink to appear for a few weeks. My oldest son brought in several branches of crab apple flowers to brighten my table, but we discovered they are not meant for such a use.  They have shed most of their blooms already. 

My husband's grandparents lilac bushes are finally in bloom, so I am heading over to see them tomorrow and bring home lilac blossoms to fill my home.  I am so excited.

Our yard is a blank canvas.  I would love to know what your favorite flowers and shrubs are, please share them.

It has been a busy week, I learned how to mend fence thanks to my wonderful in-laws.  And, I look forward to a few more days of work.  I am very thankful for my stand mixer, I can't imagine stirring after pounding staples all day!   Tomorrow I am going to post a coconut cake I have been dying to try.      

Sunday, May 2, 2010

On the Grill: Maui Grilled Chicken


This is another one of those restaurant recipes. There was a bar and grill that we went to occasionally when we lived in the KC area and when we went I always ordered the same thing - Maui Chicken. This is my version. I will also include how I make asparagus. My children love asparagus! I always serve the chicken with Uncle Ben's wild rice. Dave usually does the grilling, because does such a superb job with it. I am one lucky lady!!!

Maui Chicken

4-6 boneless, skinless chicken breasts
Lawry's Mesquite Marinade
4-6 slices of cheddar cheese
15 1/4 oz can of pineapple slices
BBQ sauce

Marinate chicken in the mesquite marinade for at least 30 min. You may marinate longer if you would like. Grill over medium heat until cooked through. Add cheddar slices the last couple of minutes of grilling. Grill pineapple slices, a couple minutes on each side. Place on top of cheddar. Serve with a side of BBQ sauce.

Enjoy!

Grilled Asparagus

Rinse and trim asparagus. Put asparagus in a pot and just cover with cold water. Bring to a boil and blanch for about 2 minutes or until bright green. Rinse several times with cold water. Drizzle with olive oil. Salt and pepper. I prefer kosher salt for this. Make sure all are coated with oil. Grill over medium heat for 3-4 minutes. Enjoy!!

This is a repost, I am linking up to Our Homeschool Home's On the Grill party, please head on over and check out what people are grilling in their backyards!

Friday, April 30, 2010

Oh, Monster Cookie, how can I bake you?


Oh, Monster Cookie, how can I bake you? Let me count the ways . . .

I can bake you with M&Ms, chocolate chips or
I can bake you with peanut butter M&Ms, or
I can bake you with pecans and dried cranberries,
Or how about with macadamia nuts, coconut and maybe some white chocolate chips

How do you make your Monster Cookies?

Next time I will leave out the chocolate chips and add more coconut and pecans.  The chocolate chips are too sweet for me.

When you bake them do you keep them the size of other cookies or do you monster size them?

We like to make ours large, sometimes they are as big as a plate!  Why else would you call them Monster Cookies????


Monster Cookies

1 lb butter, softened
4 cups sugar
2 lb brown sugar
12 eggs
1 Tbsp light corn syrup
2 Tbsp vanilla
8 tsp baking soda
16 -18 cups oatmeal
3 lbs peanut butter
7 oz shredded coconut
1 medium bag M&Ms
1 medium bag peanut butter M&Ms
1 lb chocolate chips

Preheat oven to 350 degrees.

Combine butter and sugars.  Mix until well combined and light and fluffy.  Add eggs one at a time, mixing in between.  Ad corn syrup, vanilla , and baking soda.  Mix well.  If you are using a stand mixer you will want to transfer the mix at this time to a very LARGE BOWL or I have even used a stock pot.  Add oatmeal and coconut. Stir and then add M&Ms and chocolate chips.  At this point I find it is easier to use my hands to mix, the bonus is silky smooth hands.

Using a large teaspoon or ice cream scoop onto cookie sheets.  BAKE at 350 for 12 -15 minutes.

NOTE:  We only make a dozen or so at a time and keep the cookie dough in the fridge until we are ready for another fresh batch of cookies.  Also, these cookies are gluten free.

Today, I am linking up to I'm Lovin' It and Friday Favorites!

Thursday, April 29, 2010

Before I Eat . . .

I just had to share this once I saw it,  you can't help but laugh out loud.  I love Anita Renfroe!  Enjoy!!!

Thursday, April 22, 2010

Cake and more Cake

This Sunday we celebrated my husband's grandpa's 92nd birthday.  His request was a Lady Baltimore cake.  This recipe was somewhat of a challenge to find and make, but I did it.

 The older generation seemed to be in heaven.  I sent pieces home with some of them, including the birthday boy.  We decided not to scare him with 92 candles and only put 10 on, he didn't need any help with blowing the candles out, even though A was standing by waiting to assist.

If you are interested in a recipe for Lady Baltimore, I suggest you venture over to Epicurious.  I was a little intimidated by the frosting, it seemed like it took an hour to whip until cool, but it worked and as I have said before those that tried it loved it.  It is not one of my favorites, but I enjoyed making it for the birthday boy.

On Sunday, I made a second cake for my kiddos and my hubby liked it so much I made it for our hunters' first meal.  Sunday we named it Dave's Yellow Cake but last night when I made it again I entitled it Dave's Mistake Cake.  When I was preparing to make it the first time I sent him to the grocery store for a yellow cake mix and he came home with a lemon mix.  It was yellow and to him that is all that mattered, well it made the cake even more enticing than the yellow mix, so we are keeping it.  Here are some pictures and then I will share the recipe.


Dave's Mistake Cake

1 lemon cake mix
4 eggs, seperated
1 1/3 cup orange juice
1/4 tsp cream of tartar
1 1/2 cup sugar
2 cups whipping cream, chilled
1 1/2 tsp vanilla
1 quart strawberries, sliced

Preheat oven to 350 degrees.  Line 2, 9-in pans with aluminum foil, leaving extra to use later to lift cake out of pans. Grease pans.

Mix orange juice, egg yolks, and cake mix.  Beat on medium speed for 4 minutes.  Pour into pans.

In a large bowl, beat egg whites and cream of tartar on high speed until soft peaks form.  Gradually add one cup of sugar and beat until stiff peaks form.  Gently spread meringue over cake batter and bake for 35-40 minutes.  Meringue should be golden brown.  Cool completely.

To assemble:  lift edges of aluminum foil to remove cakes from pans, gently pull foil away from cakes.  Whip whipping cream, 1/4 sugar, and vanilla until stiff peaks form.  Place one cake on a plate with meringue side up, spread 1/2 of whipped cream on top of meringue. Layer strawberries on top of whipped cream, then place second cake on top and repeat with whipped cream and strawberries.  Enjoy!!!

*******

Today, I am linking up to I'm Lovin' It over at Tidy Mom.  Please head on over and show everyone some love.  Also, check out Friday Favorites on Simply Sweet Home.

Wednesday, April 7, 2010

Easter Memories

Easter is one of my favorite holidays. Spring brings such a feeling of joy and newness after the long hard winter. Grass is turning green, tulips are poking their heads up, birds are singing and we take time to celebrate our risen King. Easter is a glorious time of year.

We begin our celebration by dying eggs, this year we went crazy and sprinkled them with glitter!! And of course we used some for deviled eggs on Sunday. Sandy at Reluctant Entertainer has a fool proof method for boiling eggs, I know, I tried it. We joke that I can do anything in the kitchen except boil eggs and fry bacon. Well, now I can boil eggs and as for the bacon, I'll just keep sticking it in the oven and if it needs to be fried, I will have Dave do it. He likes to feel needed!!!

As you can see, we didn't fair too well on the whole picture thing. No one wanted to behave, if anyone knows the trick to getting your child to smile naturally, I would love to hear about it.
We also had the customary egg hunt after lunch. Dad and Grandpa always get very creative with where they hide the eggs. We missed the cousins this year, but we still had a great time. Almost every Easter is spent at my in-laws. They have a beautiful home in the canyons. And every year, well at least the last few years, we all get the flu!!! I am not kidding. This year no one was sick, thank goodness, but the last few years it ran through the family. Last year I was sick for two weeks! This is one tradition we hope is over!!
We are blessed to live near Dave's grandparents, both sets and a few of his aunts and uncles. I love that our children know their great grandparents. They enjoy spending time with them and of course the greats love it too.

Well, since this is my baking blog I should share with you about our meal. I only needed to do one thing this year and that was green bean casserole, a family favorite. My oldest doesn't like gravy, can you believe it, so he uses green bean casserole for his 'gravy' - crazy boy!! We weren't able to get together for Christmas this year because of the storm, so we did turkey, mashed potatoes, gravy, stuffing, green bean casserole, rolls, deviled eggs (which I made as well), homemade cranberry sauce, chocolate cream pie, pecan pie, and cream puffs. Everyone has their traditional meal, in my family Easter meant ham, but you know, it really doesn't matter. Making food that people love because you love them, that is the important thing. Spending time together with family and friends around the table that is the best thing about holidays and any other day of the year.

Today I am linking up to Home is . . . over on Reluctant Entertainer hop on over and see what others are sharing about their Easter memories.
Posted by Picasa

Wednesday, March 31, 2010

Home is . . .so many things

Today I am linking up to Sandy's Home is . . . Party over on Reluctant Entertainer. Her theme for this week is scent. There are so many scents to me that mean home, every season I have a new scented candle that reflects what that season means to me. Spring usually means lilacs to me. My grandparents lived across the street from my school and they had a whole hedge of lilacs for us to pick from. Also, the smell of baking bread invokes Grandma's house. It is a new scent in my home as well. Yesterday, was the first day I had ever made homemade bread. I made it again today. Eight loaves total. Some have been given as gifts. Some have been used for sandwiches and french toast. Home is baked bread.
Home is the smell of fresh cookies, like the ones I am making at this moment for our church's Resurrection Celebration this afternoon. I am in charge of helping 40+ children decorate their "Easter Eggs." I remember getting off the bus and opening the door to the aroma of chocolate chip cookies or any other variety that Mom would have waiting for us. I don't do that as much as I should for my own dear children. Something I am working on rectifying.
Home is chocolate cake. The cake of choice for birthdays or other celebrations for many members of the family. This particular cake is being sent to feed the youth group this evening.

Home is also the smell of a clean kitchen or bathroom. Home is the scent of fresh clothes right from the dryer still smelling of April flowers and warm to the touch. Home is the clean scent of a freshly bathed child snuggled onto your lap. Home is my husband's cologne because home is where he is. But, I think most of all the scent of home is whatever is cooking in the kitchen, because not only does it fill my home with the scent of love, but it can be given away so that we can share our home with others.

**Oh, and normally I do not do this much baking. This just happened to be one of those days when everything happens at once. Know what I mean? So, please take some time and check out the other 'scents' at Reluctant Entertainer.
Posted by Picasa

Tuesday, March 30, 2010

Our Kitchen: Closer to complete

Being married to a carpenter has many perks and today I am showcasing one of them. The above picture was my Valentine's present. There is a story behind almost every piece in our kitchen. We have been blessed over and over through out our married life and this one room is home to several of our blessings. The copper hood above, as well as the stove top and cabinets that house the stove top were given to us by a friend of my dad's when she remodeled her kitchen. We used quite a bit of elbow grease to clean the hood and Dear Hubby had to cut it down to fit the space we had. Also, the tile back splash was a find. In one of our recent homes, we found several boxes of these ceramic tiles. I am not sure what era they are from, but they were made in Italy! It took me awhile to warm up to them, but I love them now. I came home after a weekend spiritual retreat to find all of the tile up. I have an amazing husband.
The same lady that gave us the stove top and hood also gave us the refrigerator and slab of butcher block, oh, and also the drawer cabinet with pulls. DH continued the tile around below the cabinets and window to the fridge. He also finished evened out the butcher block that is now attached to an antique wash stand we inherited from my mom.
The dishwasher was given to us by my in-laws, they had updated their kitchen recently and I love having a dishwasher now! DH put in new flooring and counter-tops and sink. I did all of the painting of cabinets and walls with the help of my mother-in-law. I still have some painting to finish and some matching door handles to find, but I am one content lady.
Finally, the cabinetry and wall oven were also a gift from the friend of my dad's. I dream of adding another oven someday, but for now a microwave spot will do. DH is planning to trim out around my microwave so it looks like it belongs until I find an oven. As you can tell, some pictures are a little older than the first one. When you are the ones doing the work, it takes time, but it is so worth it.

I am so thankful for the many ways the Lord has blessed me, mostly for my family and friends, but also for my kitchen. :)

Today, I am linking up to Best DIY projects of March. Please go check out the incredible DIY projects shown there. There are so many talented people in this blog-world!
Posted by Picasa

Friday, March 26, 2010

Princess Grace's 9th Birthday Part 2


For some reason I can't add more than five pictures to a post, but maybe that is normal. I did want to share a few more pictures from the party. The girls had a great time, being girls. They came all the way here from Down Under, or so they said, and they had the accents to prove it! They danced, they sang, they posed, they painted finger nails, and got all dressed up. They grow up way too fast!!!

Princess Grace's 9th Birthday Part 1

Today's party was a last minute thing, we just didn't know if it was going to work for us this weekend. It really came together in a short amount of time. I was really proud of myself for keeping the cost to a minimum. I only spent $1.75 per girl for party favors which consisted of a card game, a feather boa, a necklace and two bracelets. Not, too shabby, if you ask me!
I used quite a few things from around the house to pull it together and the paper plates only cost $1.
Once again, my cake got a little top heavy, but it tasted great. The strawberries were filled with a cheesecake filling and then, of course dipped in chocolate.
I made ham sandwiches cut in the shape of stars and tortilla rolls to balance out the sweets. I cut up strawberries and a few lemon slices to add to ice water. Everything was fit for the princesses that attended. They even sipped on Shirley Temples.
Here are those wonderful princesses, at least I think ... maybe... I'm not too sure :)

Today, I am linking up to Tidy Mom's I'm Lovin' It Party. It's a party day, the sun is out and life is good!

Tuesday, March 23, 2010

And, the winner is . . .

Thank you to all of you that participated in my first give-away. I am happy to announce that the winner is Bridget from Bake at 350. Congratulations, Bridget! I hope you enjoy your new scone pan.

Our Take on Homemade Pizza

BBQ Chicken with Banana Peppers
Pepperoni with Green Olives and Roasted Garlic Alfredo Sauce


These two examples of our homemade pizza were incredibly tasty, but they are not our favorite form of homemade pizza. The family favorite is Bacon Cheeseburger. Our Bacon Cheeseburger Pizza consists of a garlic Alfredo/mustard sauce, hamburger, pieces of bacon, diced pickles, Roma tomatoes, red pepper flakes, and several types of cheese. But, since it is sorta a family secret I can't tell you specifics, so I have given you the list of ingredients to play with and make your own. I promise you will not be disappointed. I AM going to share with you the recipe for the pizza dough, you will be able to create all kinds of pizza, bread sticks, Stromboli, and whatever else your little heart imagines. That is what I love about cooking, it is your imagination and creativity that takes something from good to unforgettable! Please use this recipe and imagine away and please share with me what you have done!

Pizza Dough


1 TBSP honey
1 TBSP yeast
1 cup warm water
1 TBSP extra-virgin olive oil
3 cups flour
1 tsp kosher salt

Combine warm water, yeast and honey in a small bowl and allow yeast to rise. (I find that water that matches the temperature of my wrist, maybe slightly warmer, has not failed me when coaxing yeast to rise.) Once yeast mixture has doubled in size add it to the flour, salt and EVOO. I use my stand mixer fixed with a dough hook. Mix (if dough is too sticky add a little flour; if too dry a little water) until dough clings to the hook and there is no dough on the sides of the mixing bowl. Pull dough off hook and set bowl aside with a damp towel over the top, to let rise. Once it has doubled in size, punch the middle of the dough down and let rise again. This recipe will make two decent sized thin crust pizzas or several individual sized pizzas, your choice. Shape into pizzas either by rolling dough out or shaping with your hands, depends on the thickness of the crust desired. We top with the ingredients of our choice and bake in a 500 degree oven for about 10 minutes.

Enjoy!
Posted by Picasa