Pages

Monday, November 30, 2009

A New Thanksgiving Tradition

This is a pumpkin pound cake that has become a tradition with my husband's side of the family. The kids love it even without whipped cream!
Pumpkin Pound Cake

2 1/2 cups sugar
1 cup vegetable oil
3 eggs
2 teaspoons vanilla
3 cups all purpose flour
2 teaspoons baking soda
1 teaspoon cinnamon
1 teaspoon ground nutmeg
1/2 teaspoon salt
1 can (15 ounces) solid-pack pumpkin
1 cup chopped pecans

In a mixing bowl, blend sugar and oil. Add eggs, one at a time, beating well after each addition. Add vanilla and pumpkin, mix well. Combine flour, baking soda, cinnamon, nutmeg, and salt; add to pumpkin mixture. Stir in pecans. Pour into a greased 12-cup flted tube pan.

Bake at 350 degrees for 60-65 minutes or until a toothpick inserted near the center comes out clean. Cool for 10 minutes before inverting onto a wire rack. Remove pan; cool completely. Dust with confectioners' sugar.


I found this recipe in a Taste of Home's Holiday Recipe collection and I tweaked a little bit to fit our tastes. Please check out other Thanksgiving traditions at Bake at 350's blog. She always has great ideas!

Wednesday, November 4, 2009

Fall Party Cupcakes

Aaron needed cupcakes for his class's fall party. So I thought I would decorate them with some homemade monsters. He is always drawing monsters, sharks, and dinosaurs so I thought he would enjoy them. Although I made mine happy and his are usually scary.
When I picked him up after school his first words were, I thought you were making pumpkins! So much for my creativity.

My limited how-to is in the post below!
Posted by Picasa

How to: Melted Candy Monsters

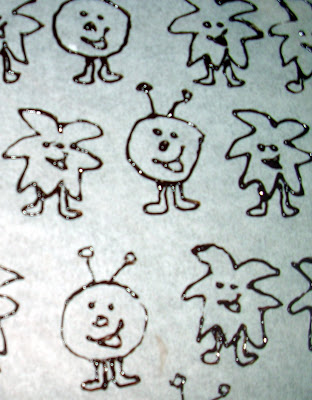
When I make candy creatures for cupcakes and cakes, I begin with a drawing. For these particular monsters, I couldn't find anything cute and fun, so I drew them myself. Sorry the picture is blurry, my camera has been acting up.
Next, I use a piece of wax paper and place my drawings behind it, so that I can see them clearly. Then I trace the drawings with melted semi-sweet chocolate. I found that a ziploc freezer bag works just great for this, just cut a small hole in one of the bottom corners. As you could see in the previous picture I only drew two monsters, so you need to carefully slide it under the wax paper to clean spot, to begin again. When I was finished, I slid my wax paper onto a cookie sheet or cutting board and put them in the freezer while I went on to the next step.

The next step is to melt candy wafers. Since I am only able to get to a place that carries these once in a blue moon, living in the middle of nowhere has an occasional drawback, the last time I purchased them I just got a big bag of white, thinking I would be able to mix what I needed later. I probably won't do that again until I find some better food coloring, the colors just weren't as bright as I had hoped.

It is best to follow the directions on the package of the candy wafers for melting, be careful not to over heat them. I also used freezer bags for this step. You need to fill a freezer bag with the melted wafers and carefully fill in your characters. Be sure to cover the entire area and then use a knife to smooth out your lines, being careful to not use too much pressure. You do not want your colored layer to be too thin, or they will break when you try to move them, but you do not want it too thick either. When I have finished filling the monsters in I place the chocolates back into the freezer or fridge to set up. I was in a hurry this day, so I placed them in the freezer. This is only the second time I have done this particular cake decoration, so I apologize if the directions are a little lacking. I must give credit to The Whimsical Bakehouse, I found the idea for these in their cookbook. They go into great detail, so the book is a great thing.

I love the look of these, it is have they came out of a child's coloring book! Have fun and be creative.
Posted by Picasa